
So, you’ve got a desire to learn how to knit a sweater, huh? Well, you’ve come to the right place! In this article, we’ll guide you through the wonderful world of knitting and show you step by step how to create your very own cozy masterpiece. From choosing the perfect yarn to mastering essential stitches, we’ll have you well on your way to knitting a sweater that will have your friends and family mesmerized by your talent. So grab your knitting needles, settle in, and get ready to embark on a delightful knitting adventure!
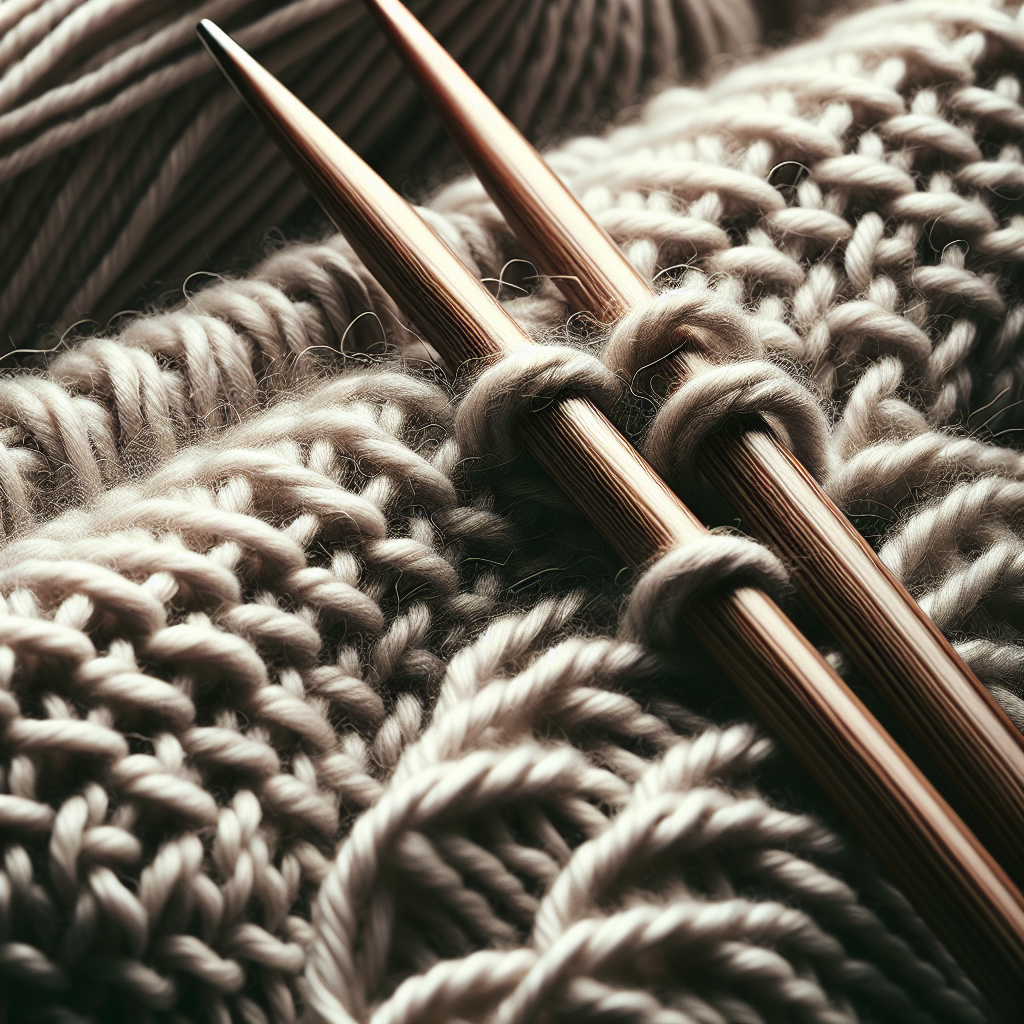
Choosing the Right Yarn and Needles
Selecting the Appropriate Yarn Weight
When it comes to knitting a sweater, choosing the right yarn weight is important. Different yarn weights create different fabric textures and drape. The yarn weight you choose will depend on the final look and feel you want for your sweater. Chunky yarns create a cozy and warm sweater, while thinner yarns create a more delicate and lightweight fabric. Consider the season and climate you’ll be wearing the sweater in, as well as your personal preference for texture and weight.
Choosing the Right Type of Yarn
In addition to considering the yarn weight, you’ll also need to choose the right type of yarn for your sweater. There are countless options available, from wool and acrylic to cotton and silk. Each type of yarn has its own unique characteristics and properties. Wool, for example, is warm and insulating, making it a great choice for winter sweaters. Cotton, on the other hand, is breathable and lightweight, making it perfect for summer sweaters. Consider the care instructions for the yarn as well, as some may require special care during washing.
Determining the Sweater Size
Before you start knitting, it’s essential to determine the size of the sweater you want to create. Sweater sizes are typically based on chest measurements, so take accurate measurements and refer to a sizing chart to ensure a proper fit. Keep in mind that knitting stretches, so the finished sweater will have some ease. If you prefer a tighter or looser fit, you can adjust the measurements accordingly. It’s always a good idea to check your gauge and compare it with the pattern to ensure accurate sizing.
Selecting the Correct Needle Size
Once you’ve chosen your yarn and determined the size of your sweater, it’s time to select the correct needle size. The needle size you use will depend on your yarn weight and the desired fabric density. If you want a looser, drapier fabric, you’ll use larger needles, while smaller needles will create a denser fabric. Check the recommended gauge on the yarn label or knitting pattern and use that as a starting point for selecting your needle size. Keep in mind that different knitters may have slightly different tension, so it may be necessary to adjust the needle size to achieve the correct gauge.
Understanding Knitting Patterns
Reading and Interpreting Knitting Patterns
Knitting patterns may seem intimidating at first, but with a little practice, you’ll soon become comfortable reading and interpreting them. Start by familiarizing yourself with the pattern’s abbreviations and notations. These shorthand symbols and terms are used to describe different stitches and techniques. Take your time to read through the entire pattern before starting, making note of any unfamiliar terms or instructions. Break the pattern down into smaller sections to make it more manageable and easier to follow.
Identifying Stitch Patterns
Stitch patterns are the building blocks of your sweater design. They determine the overall texture and appearance of the fabric. Knitting patterns will often include written instructions, charts, or a combination of both to guide you through the stitch patterns. It’s essential to understand how to read charts and recognize different stitch symbols. Take the time to practice each individual stitch pattern before incorporating it into your sweater.
Understanding the Sizing Chart
Most knitting patterns will include a sizing chart that provides the measurements for different parts of the sweater, such as the chest, waist, and length. Understanding the sizing chart is crucial for achieving the correct fit. Take the time to compare your measurements with those provided in the chart to ensure you’re knitting the correct size. If necessary, make adjustments to the pattern to accommodate your unique measurements.
Notations and Abbreviations in Patterns
Knitting patterns often contain various notations and abbreviations that may be unfamiliar to beginners. These notations serve as a shorthand way of conveying instructions. Some common abbreviations include k for knit, p for purl, and inc for increase. Take the time to familiarize yourself with these abbreviations by referring to a knitting glossary or online resources. Understanding the notations and abbreviations will make it easier to follow knitting patterns and execute the desired stitch patterns accurately.
Gauging and Swatching
Importance of Gauge in Sweater Knitting
Gauge refers to the number of stitches and rows per inch in a knitted fabric. It is essential to achieve the correct gauge in your sweater knitting to ensure the finished garment’s proper size and fit. Even a slight difference in gauge can result in a significantly different-sized sweater. Therefore, it’s crucial to knit and measure a gauge swatch before starting your project.
Measuring Gauge with a Swatch
To measure your gauge, knit a swatch using the same needles and stitch pattern you plan to use for your sweater. The recommended gauge is usually specified in the knitting pattern. Once the swatch is complete, let it rest and relax for a while. Then, measure a section of four inches across the swatch to determine your stitch and row gauge. If your gauge doesn’t match the pattern’s recommended gauge, you may need to change your needles or adjust your tension until you achieve the desired gauge.
Blocking and Measuring the Swatch
Blocking is an essential step after measuring your gauge swatch. Blocking involves gently washing and shaping the swatch to allow the fibers of the yarn to relax and settle into their final positions. Once the swatch is dry, remeasure the gauge to see if there are any changes. Blocking can sometimes affect the gauge, so it’s essential to block your swatch before finalizing your stitch count and starting your sweater.
Casting On and Creating a Foundation
Choosing the Right Cast-On Method
The cast-on method you choose will depend on the desired edge for your sweater. Some common cast-on methods include the long-tail cast-on, the knitted cast-on, and the cable cast-on. Each method creates a different edge, so consider how it will complement the overall design of your sweater. It’s important to cast on the appropriate number of stitches to match the pattern instructions and achieve the desired size and shape.
Calculating the Number of Stitches
To calculate the number of stitches needed for your sweater, multiply the stitch gauge by the desired finished measurement of the sweater. Subtract any additional stitches specified in the pattern for seams or other design elements. Keep in mind that knitting stretches, so the finished sweater will have some ease. Adjust the number of stitches accordingly to achieve the desired fit.
Working the Ribbing
Ribbing is often used at the beginning of a sweater to create a stretchy and snug cuff or hem. It adds structure and prevents the edges from rolling. Common ribbing patterns include knit 1, purl 1 (K1, P1) ribbing or knit 2, purl 2 (K2, P2) ribbing. Follow the pattern instructions to work the ribbing for the desired length, and ensure the number of stitches remains consistent with the stitch count.
Knitting the Body and Sleeves
Working in the Round vs. Flat
When knitting the body and sleeves of your sweater, you can choose to work in the round or flat. Working in the round involves knitting all stitches continuously, while working flat means knitting back and forth in rows. The choice depends on the overall design and construction of your sweater, as well as your personal preference. Circular needles or double-pointed needles are typically used for knitting in the round, while straight needles are used for knitting flat.
Increments and Decrements for Shaping
To create a well-fitting sweater, shaping is essential. Increments and decrements are used to add or subtract stitches in specific areas to create curves and shape the garment. Common shaping techniques include increases, such as knit front and back (KFB), or decreases, such as knit two stitches together (K2tog). The pattern will provide instructions on when and how to incorporate these shaping techniques.
Adjusting for Different Body Lengths
Not everyone has the same body length, and it’s important to adjust the pattern to suit your proportions. If you have a longer or shorter torso, it may be necessary to add or subtract rows to achieve the desired length. Take accurate measurements and compare them with the pattern instructions to identify any necessary modifications. Consider how modifications may affect other aspects of the sweater, such as armhole depth or sleeve length.
Creating the Armhole Openings
Armhole openings allow for comfortable movement and ensure that the sweater fits properly around the shoulders. The pattern will usually specify where to start the armhole shaping and how many stitches to bind off or place on hold. Follow the instructions carefully to create clean and well-fitted armhole openings. Use stitch markers to help you keep track of the shaping and ensure symmetry between the front and back of the sweater.
Knitting the Sleeves
Sweater sleeves can be knit in different ways, depending on the desired design and ease of knitting. Some patterns may have you knit the sleeves in the round using double-pointed needles or circular needles, while others may require knitting them flat and seaming them later. Follow the pattern instructions for the sleeve construction method and shaping details. Pay attention to the specified length and adjust accordingly for a customized fit.
Adding Neckline and Shoulder Shaping
Creating the Neckline Opening
The neckline is an important design element that can dramatically change the look of your sweater. Different necklines, such as crew neck, V-neck, or boat neck, can be created by varying the shaping methods. The pattern will provide specific instructions on when and how to start the neckline shaping. Be sure to follow the directions carefully and make any necessary adjustments based on your personal preferences.
Shaping the Shoulders
Shoulder shaping is crucial for achieving a comfortable and well-fitting sweater. The pattern instructions will guide you on when and how to shape the shoulders. This often involves binding off a certain number of stitches at the beginning of rows or working short rows to create gentle slopes. Pay attention to the pattern, ensuring you shape both shoulders symmetrically to achieve a balanced neckline and comfortable fit.
Pick Up and Knit Stitches for Neckband
The neckband is a finishing touch that adds structure and completes the neckline of your sweater. Depending on the design, the pattern may instruct you to pick up and knit stitches along the neckline. This involves inserting the needle into the edge stitches and creating new stitches to form the band. Follow the pattern instructions for the number of stitches to pick up and how to work the neckband. This technique helps create a clean and polished finish for your sweater.
Joining the Body and Sleeves
Seaming or Joining with a 3-Needle Bind Off
Once the body and sleeves are complete, it’s time to join them together to assemble your sweater. There are various methods for joining the body and sleeves, including seaming with a tapestry needle or using a 3-needle bind off. Seaming involves sewing the seams using a mattress stitch or a backstitch, ensuring a sturdy and invisible finish. Alternatively, a 3-needle bind off creates a joined seam that is neat and efficient. The choice of technique will depend on your preference and the overall design of your sweater.
Attaching Sleeves to the Body
When attaching the sleeves to the body, it’s important to line up the armhole openings and ensure a smooth and even seam. Begin by pinning the sleeves to the body, aligning the stitches and seams. Use a tapestry needle and the chosen seaming method to join the pieces together. Take your time and sew with care to create a seamless transition between the body and sleeves. Once complete, weave in any loose ends to give your sweater a polished appearance.
Finishing Touches
Weaving in Ends and Securing Loose Yarn
At this point, your sweater is almost complete. Take the time to weave in all loose ends and secure any remaining yarn tails. Using a tapestry needle, thread the yarn through nearby stitches to conceal the end. This prevents unraveling and gives your sweater a tidy and professional finish. Trim any excess yarn, being careful not to cut through the stitches, and double-check for any missed ends.
Blocking the Sweater
Blocking is the process of gently shaping and setting your finished sweater to its final dimensions. It allows the stitches to relax and the fabric to even out. Depending on the yarn used, blocking can involve washing, wetting, or steaming the garment. Follow the yarn manufacturer’s recommendations or the pattern instructions for the appropriate blocking method. Lay your sweater flat on a blocking mat or towel, shape it to the desired measurements, and let it dry completely.
Adding Buttons or Other Closures
If your sweater design includes buttons or other closures, now is the time to add them. Choose buttons that complement the style and color of your sweater. Sew them securely onto the button bands or closures using a needle and thread. Ensure that the buttons are evenly spaced and properly aligned. Take your time to sew them on securely, as buttons can add both functionality and aesthetic appeal to your sweater.
Sewing on Pockets
If your sweater design includes pockets, now is the time to sew them on. Follow the pattern instructions for the pocket placement and construction method. Carefully sew the pocket edges to the fabric using a tapestry needle and matching yarn or thread. Ensure that the pockets are centered and securely attached to the sweater. This step adds both practicality and style to your finished garment.
Creating Ribbed Edges
Ribbed edges, such as cuffs and hems, give your sweater a polished and professional look. To create ribbed edges, alternate knit and purl stitches in a specific pattern, such as K1, P1 or K2, P2. Follow the pattern instructions for the desired length and width of the ribbing. This technique adds structure and elasticity to the edges, preventing them from rolling. Take your time and work the ribbing neatly and evenly.
Advanced Techniques
Creating Cable Knitting Patterns
Once you’ve mastered the basics of sweater knitting, you may want to explore more advanced techniques, such as cable knitting. Cable knitting creates beautiful textured patterns by crossing stitches. It adds depth and visual interest to your sweater. Learn how to read cable charts or written cable instructions, and practice cable techniques on smaller projects before incorporating them into your sweater.
Incorporating Fair Isle or Colorwork
Fair Isle or colorwork knitting involves working with multiple colors in a single row or round to create intricate patterns and designs. This technique adds vibrancy and complexity to your sweater. Practice knitting with two or more colors and experiment with different color combinations to create stunning colorwork motifs on your sweater. Follow the pattern instructions carefully to ensure proper tension and stitch definition.
Knitting Lace Panels
Lace panels are delicate and airy, perfect for adding a touch of elegance to your sweater. Lace knitting involves creating patterns with yarnovers and decreases to form eyelet motifs. Practice knitting lace swatches to familiarize yourself with the techniques before incorporating them into your sweater. Take your time and knit with precision to showcase the intricate lace patterns on your finished garment.
Working with Different Stitch Patterns
As you gain experience with sweater knitting, you can experiment with various stitch patterns to create unique designs. Different stitch patterns, such as seed stitch, moss stitch, or garter stitch, can be combined or used individually to create interesting textures and visual effects. Use stitch dictionaries or online resources to explore different stitch patterns and practice them before incorporating them into your sweater.
Caring for Your Knitted Sweater
Washing and Blocking
To keep your knitted sweater in optimal condition, it’s important to follow proper washing and blocking techniques. Different yarns may require specific care instructions, such as hand washing or machine washing on a gentle cycle. Always check the yarn label for recommended washing instructions. After washing, reshape your sweater by blocking it to the correct dimensions. This helps retain the shape and drape of the garment.
Storing and Maintaining
When not wearing your knitted sweater, it’s important to store it properly to prevent stretching or damage. Fold or roll the sweater, rather than hanging it, to maintain its shape. Store it in a cool, dry place away from direct sunlight to prevent fading. Check for any signs of moths or insects, and use appropriate measures to protect your sweater from infestations. Regularly inspect and mend any loose threads or small damages to ensure your sweater stays in good condition.
Repairing Small Damages
Over time, your knitted sweater may develop small damages, such as snags or holes. It’s important to address these issues promptly to prevent further damage. For minor snags, use a crochet hook or blunt needle to carefully pull the snagged thread through to the inside of the fabric. For small holes, use a darning needle and matching yarn to weave in new stitches to close the hole. Take your time and work with precision to make the repairs as invisible as possible.
By following these steps and incorporating your personal style and creativity, you can successfully knit a beautiful and customized sweater. Enjoy the process of knitting and take pride in wearing your handmade garment!